
4 : Foundations
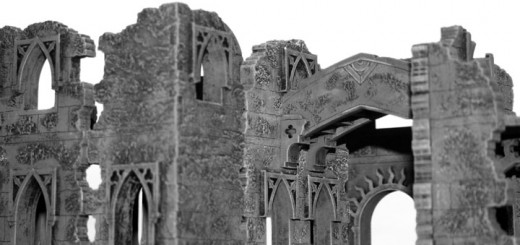
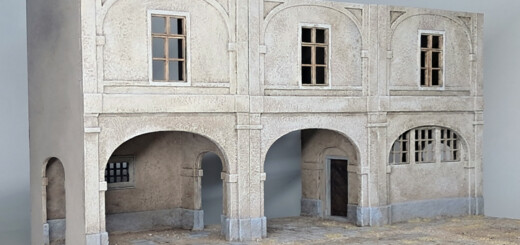
The 4Ground Frozen City Ruins kits would be produced pre-coloured in a cool grey. But before the 4Ground kits were released, I began building my own Frozen City with the original prototype models. Without the benefit of being pre-coloured, the originals would need to be undercoated. I really liked the idea of undercoating in a similar grey to the 4Ground kits. However, the grey of the kits is much more my idea of a finish colour. I wanted to use a darker colour as an undercoat. In the end, I decided to have a shot at the same sort of colour scheme as my 18mm models. I definitely planned, though, to finish off my models with some 4Ground basing materials to add even more of a frosty look.
First off, I thought I’d remind myself how I textured and painted my 18mm models.
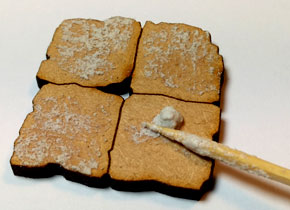
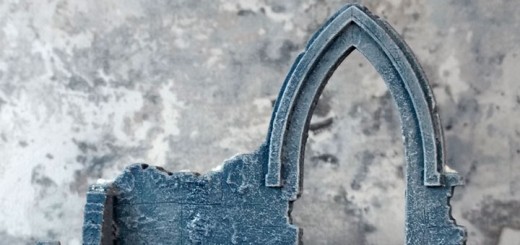
The models can be painted just as they are. It can be a good idea to keep the floors that figures are to stand on flat. But a quick spread of texture paste can make all the difference to the look of the ruins.
Before painting, a coating of paste was spread on the models – not all over but touches here and there – as a textured finish. Care was taken to avoid the engraved lines and to keep the spread thin (especially on the floors). For the 18mm models, I used acrylic pastes with added ultra-fine grit. DecoArt media texture sand paste was found to be ideal.
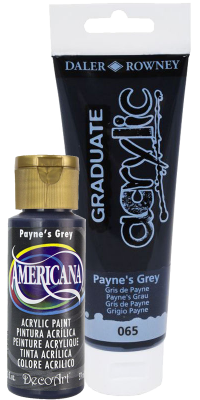
Some modellers like to undercoat fibreboard models with spray paint but here we’re just brushing on an undercoat with regular acrylic paint.
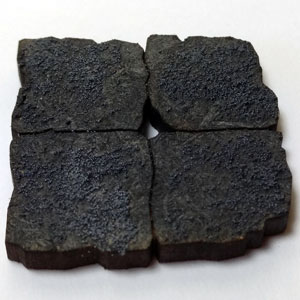
First, the models were lightly undercoated with Payne’s Grey. Payne’s Grey is a very dark blue often used as a mixer in place of black, being less intense than black. It gives the grey Frozen City Ruins a subtle cold blue look. I used the cheaper varieties of Arts and Crafts acrylic paint.
A succession of dry-brushed greys build up a cold appearance.
Then, a covering of a dark grey was liberally dry-brushed over the entire model, revealing the engraved lines.
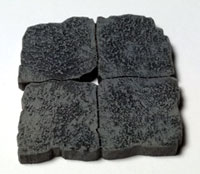
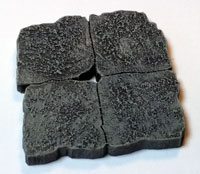
Next, a dry-brushing of a lighter grey was used to highlight the model’s detail.
White was then used to add a frosty finish and final highlights, especially to the edges and the tops of the ruins. A downward brush stroke can give the impression of melting snow and ice.
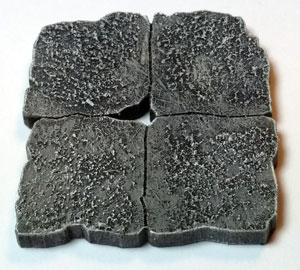
Lastly, where needed, the undercoat colour was used, very dilute, as a wash over any areas that needed to be dulled down or given added depth. Likewise, the undercoat colour mixed with a dark grey was used to finish off, touch up, detail, and paint difficult to get at areas.
RECENT COMMENTS